Search
Logo Large
Search

GVT Applications and Installations

Table of Contents

From the file of Tree Tile, we give you a brief overview of the uses and installations of vitrified tiles, a kind of ceramic tile that goes through a particular manufacturing process to produce a finish that resembles glass and is extremely durable.

Applications

1. Flooring

Tree Tile assure you to give the best Vitrified tiles, which are frequently utilized as flooring in a variety of settings, such as public places, business structures, and residential dwellings. Their resistance to stains, wear, and dampness is well known.

2. Walls

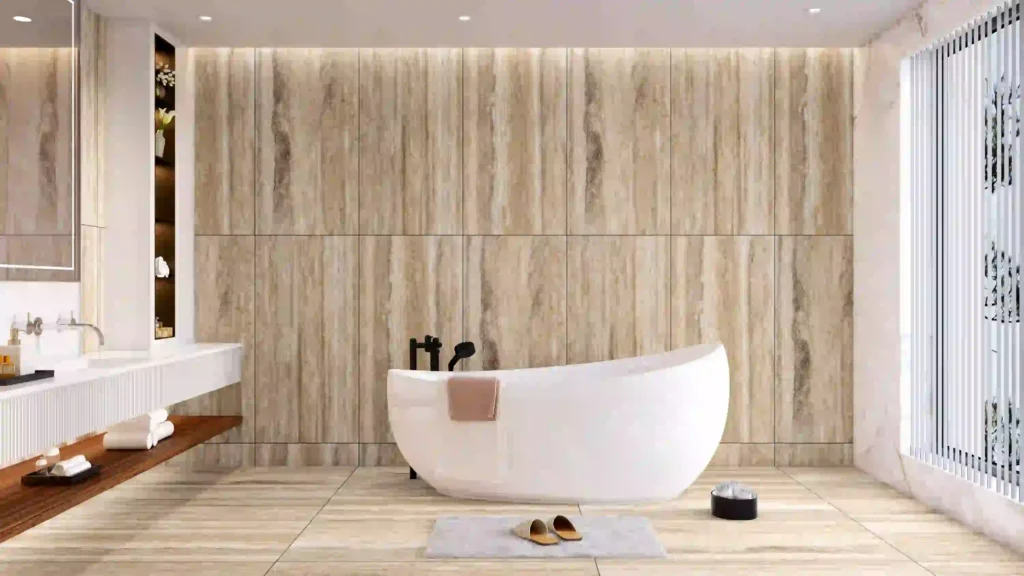
We have a lot of varieties for our superior customers in kitchen walls, bathroom walls, and other spaces that require a hardy, hygienic surface can be covered with vitrified tiles.

3. Countertops

Vitrified tiles can be utilized as countertops in kitchens and baths. They are appropriate for these applications because of their stain resistance and durability.

4. outside Spaces

Certain vitrified tiles are intended for outdoor application. Because they are weather-resistant, they can be utilized for patios, walks, and other external surfaces.

5. Commercial Areas

Because vitrified tiles are long-lasting and low maintenance, they are frequently used in commercial settings such as restaurants, retail establishments, and offices.

Installation

1. Preparation of Surface

The installation of vitrified tiles requires careful surface preparation. This could entail utilizing the proper underlayment, cleaning and clearing the floor of trash, and levelling it. Beyond durability, ‘Tree Tile’ vitrified tiles provide other benefits. An adaptability is what makes them beautiful. Polished versions radiate a sophisticated, lustrous sheen that is perfect for living spaces. Go for matte or textured versions for a touch of rustic appeal. We bring a bit of nature indoors by imitating natural stones like marble or wood. Thanks to contemporary developments, full-body vitrified tiles are now available with a uniform colour throughout, making chips and scratches invisible. Tree Tile also improve longevity and hygiene because of their minimal water absorption, which makes them ideal for wet environments like bathrooms and kitchens.


2. Application of Adhesive

When installing vitrified tile, adhesives and thin-set mortars are essential, but the procedure is more involved than just glue and stick. We are selecting the appropriate adhesive type is crucial, taking into account elements like traffic, moisture exposure, and floor type. Next is appropriate surface preparation, which includes priming, levelling, and cleaning to guarantee ideal adherence. By using a notched trowel to apply the glue, you can minimize air pockets and stop tile movement by creating ridges for optimal contact. Applying a tiny layer on the tile back, known as back-buttering, improves contact even more with heavier and larger tiles. Time and accuracy are of the essence; installing tiles requires manageable pieces to keep the adhesive workable. Recall that the basis for a strong, long-lasting vitrified tile floor is properly applied glue.

3. Position of Tiles

Tree Tile reaching on the level of proficiency produces a perfect, visually appealing surface. First, arrange your space in advance, making sure to have an attractive pattern and make cuts around obstructions. To create a straight beginning point and reference lines for succeeding rows, use a chalk line or laser level. Tile spacers now turn into your pals. In order to maintain uniform grout lines and stop tiles from crowding or separating, these tiny plastic crosses are used. Always remember that consistency is essential. Keeping the spacing regular throughout produces a rhythm that is visually pleasing and reduces the visibility of installation flaws. Make sure every tile is flush and level with a tapping block and level to remove any unevenness that could lead to trip hazards or detract from the overall design. Tile laying is a laborious dance that requires careful preparation, exact alignment, and dependable spacers.

4. Grouting

Grout is placed in between the tiles after they have been installed. Grout improves the installation’s overall stability and look in addition to filling up the gaps. Applying the mixture and hoping for the best is not grouting. The grout float—which looks like a tiny rubber squeegee—is the best tool for the job. ‘Tree Tile’ applying grout diagonally across the joints, making sure to cover any nooks and crannies without going overboard. As you go, remove any extra grout from the tile surface by working in reasonable chunks.

5. Sealing, if necessary

Porosity, or the amount of liquid that a tile can absorb, is the important component. Generally speaking, highly vitrified tiles with almost little porosity don’t require sealing. A quick water test that involves sprinkling water on an inconspicuous place can be useful. You can proceed if it only beads up without soaking in. Think about sealing it if it absorbs or darkens easily.

6. Final Details

The installation is finished by washing the tiles and scraping off any extra grout. To give the tiles the desired gloss, finishing touches could involve buffing or polishing them.

Conclusion

It’s crucial to remember that installation instructions for Glaze Vitrified Tiles should be sought from the manufacturer or a certified specialist. Furthermore, after my previous update, there might have been advancements or modifications to the business or product; therefore, for the most up-to-date information, it is advised to consult Glaze Vitrified Tiles’ most recent information.


Find Your Perfect Tiles – Get Expert Help Today!

Tell us about your project, and we’ll provide personalized tile recommendations and pricing.

100% Response Rate

We’re here for you! Expect a response within 24 hours

About Us how can we help you

Get Free Expert Advice | Request Callback